2. Set up your phone
■ Antenna
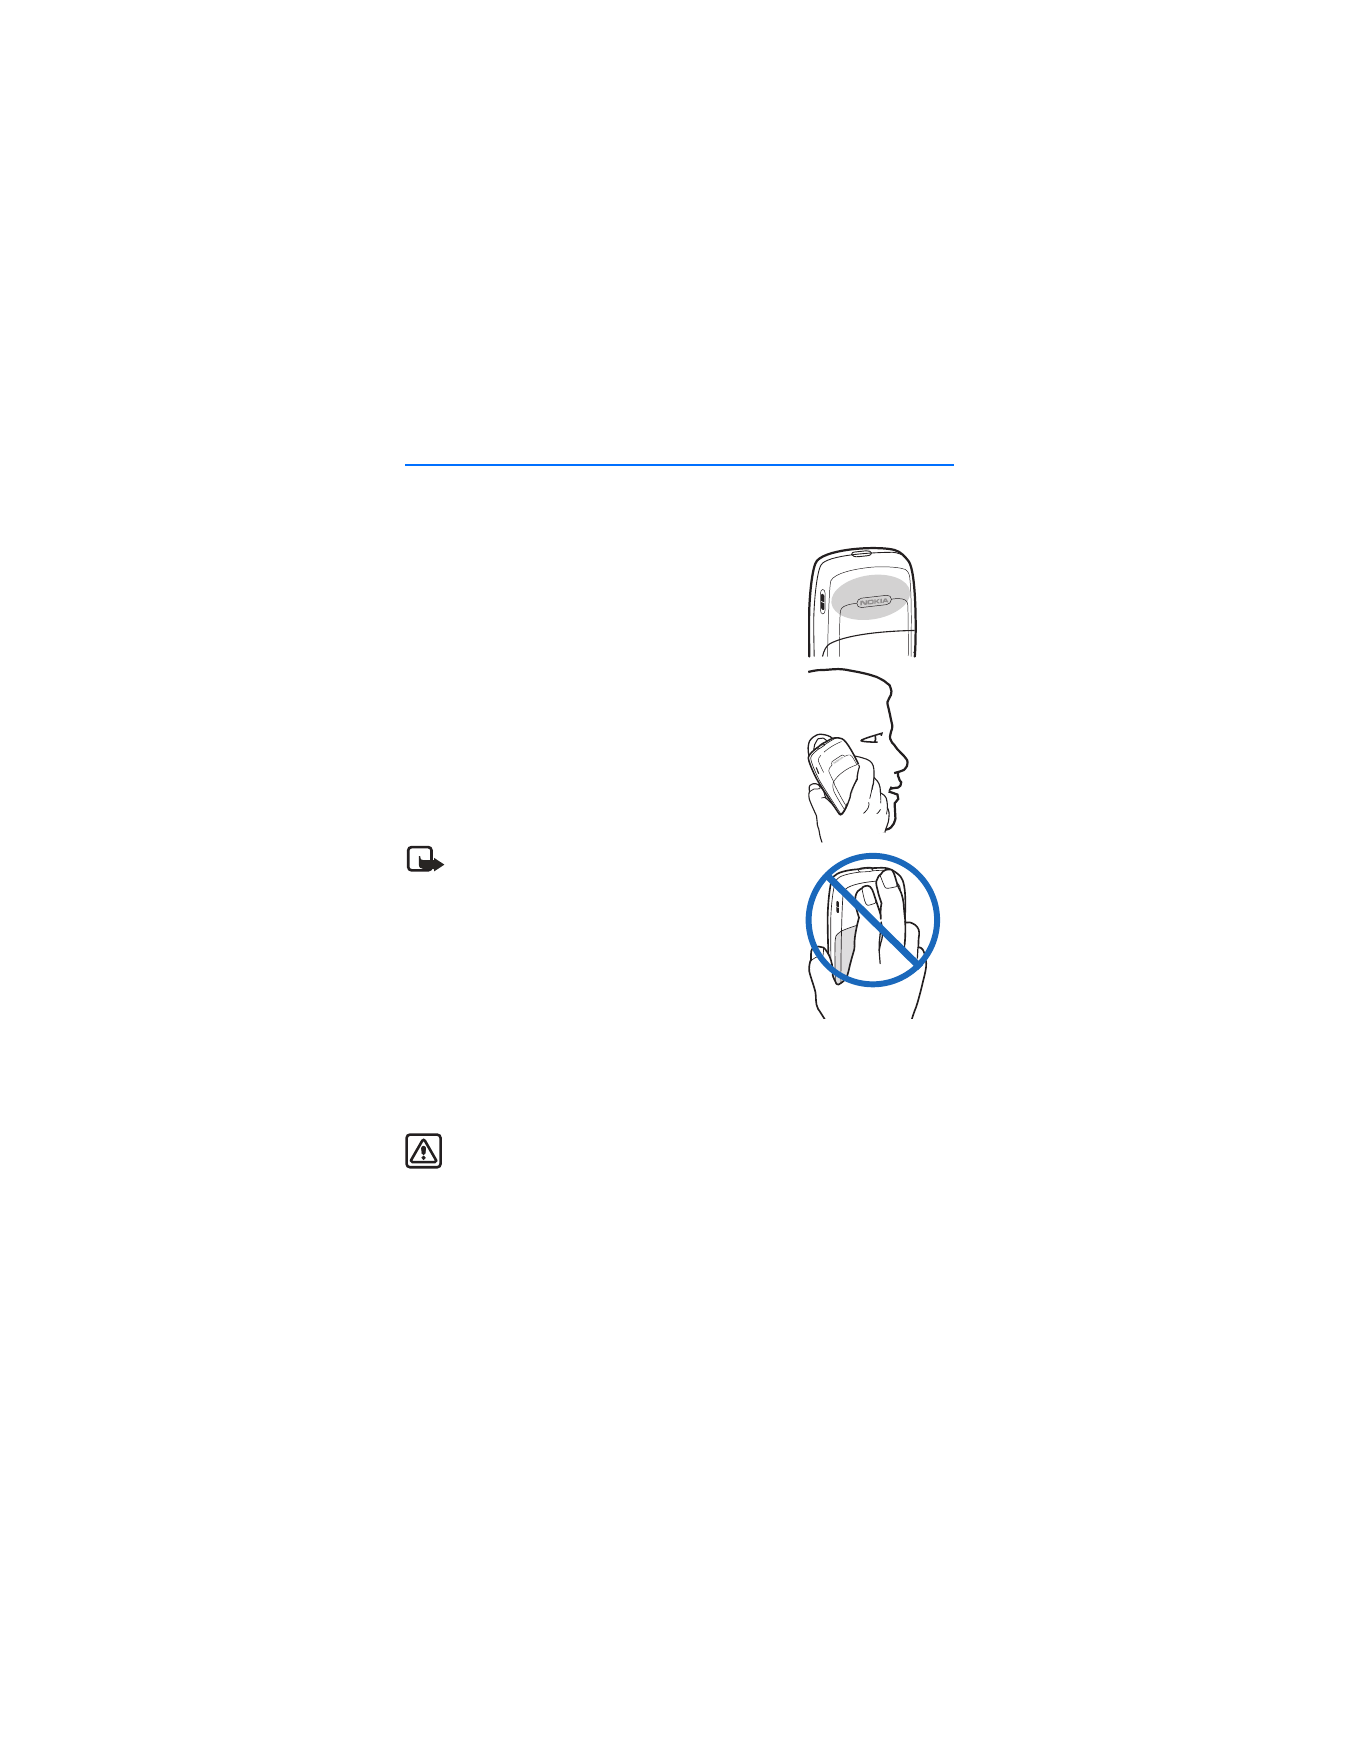
Your phone has an internal antenna that is located
toward the top of the phone.
Hold the phone as you would any other telephone with
the antenna area pointed up and over your shoulder.
Note: As with any other radio transmitting
device, do not touch the antenna unnecessarily
when the device is switched on. Contact with
the antenna affects call quality and may cause
the device to operate at a higher power level
than otherwise needed. Avoiding contact with
the antenna while operating the device optimizes
the antenna performance and the battery life.
■ Change the battery
Always switch the device off, and disconnect the charger before removing
the battery.
Warning: Use only batteries, chargers, and enhancements approved by
Nokia for use with this particular model. The use of any other types may
invalidate any approval or warranty, and may be dangerous.
Check the model number of any charger before use with this device. This device is
intended for use when supplied with power from the ACP-7 and ACP-12 chargers.
S e t u p y o u r p h o n e
14
For availability of approved enhancements, please check with your dealer. When
you disconnect the power cord of any enhancement, grasp and pull the plug, not
the cord.
Note: Always switch off the power and disconnect the charger and any
other device before removing the cover. Avoid touching electronic
components while changing the cover. Always store and use the device
with the cover attached.
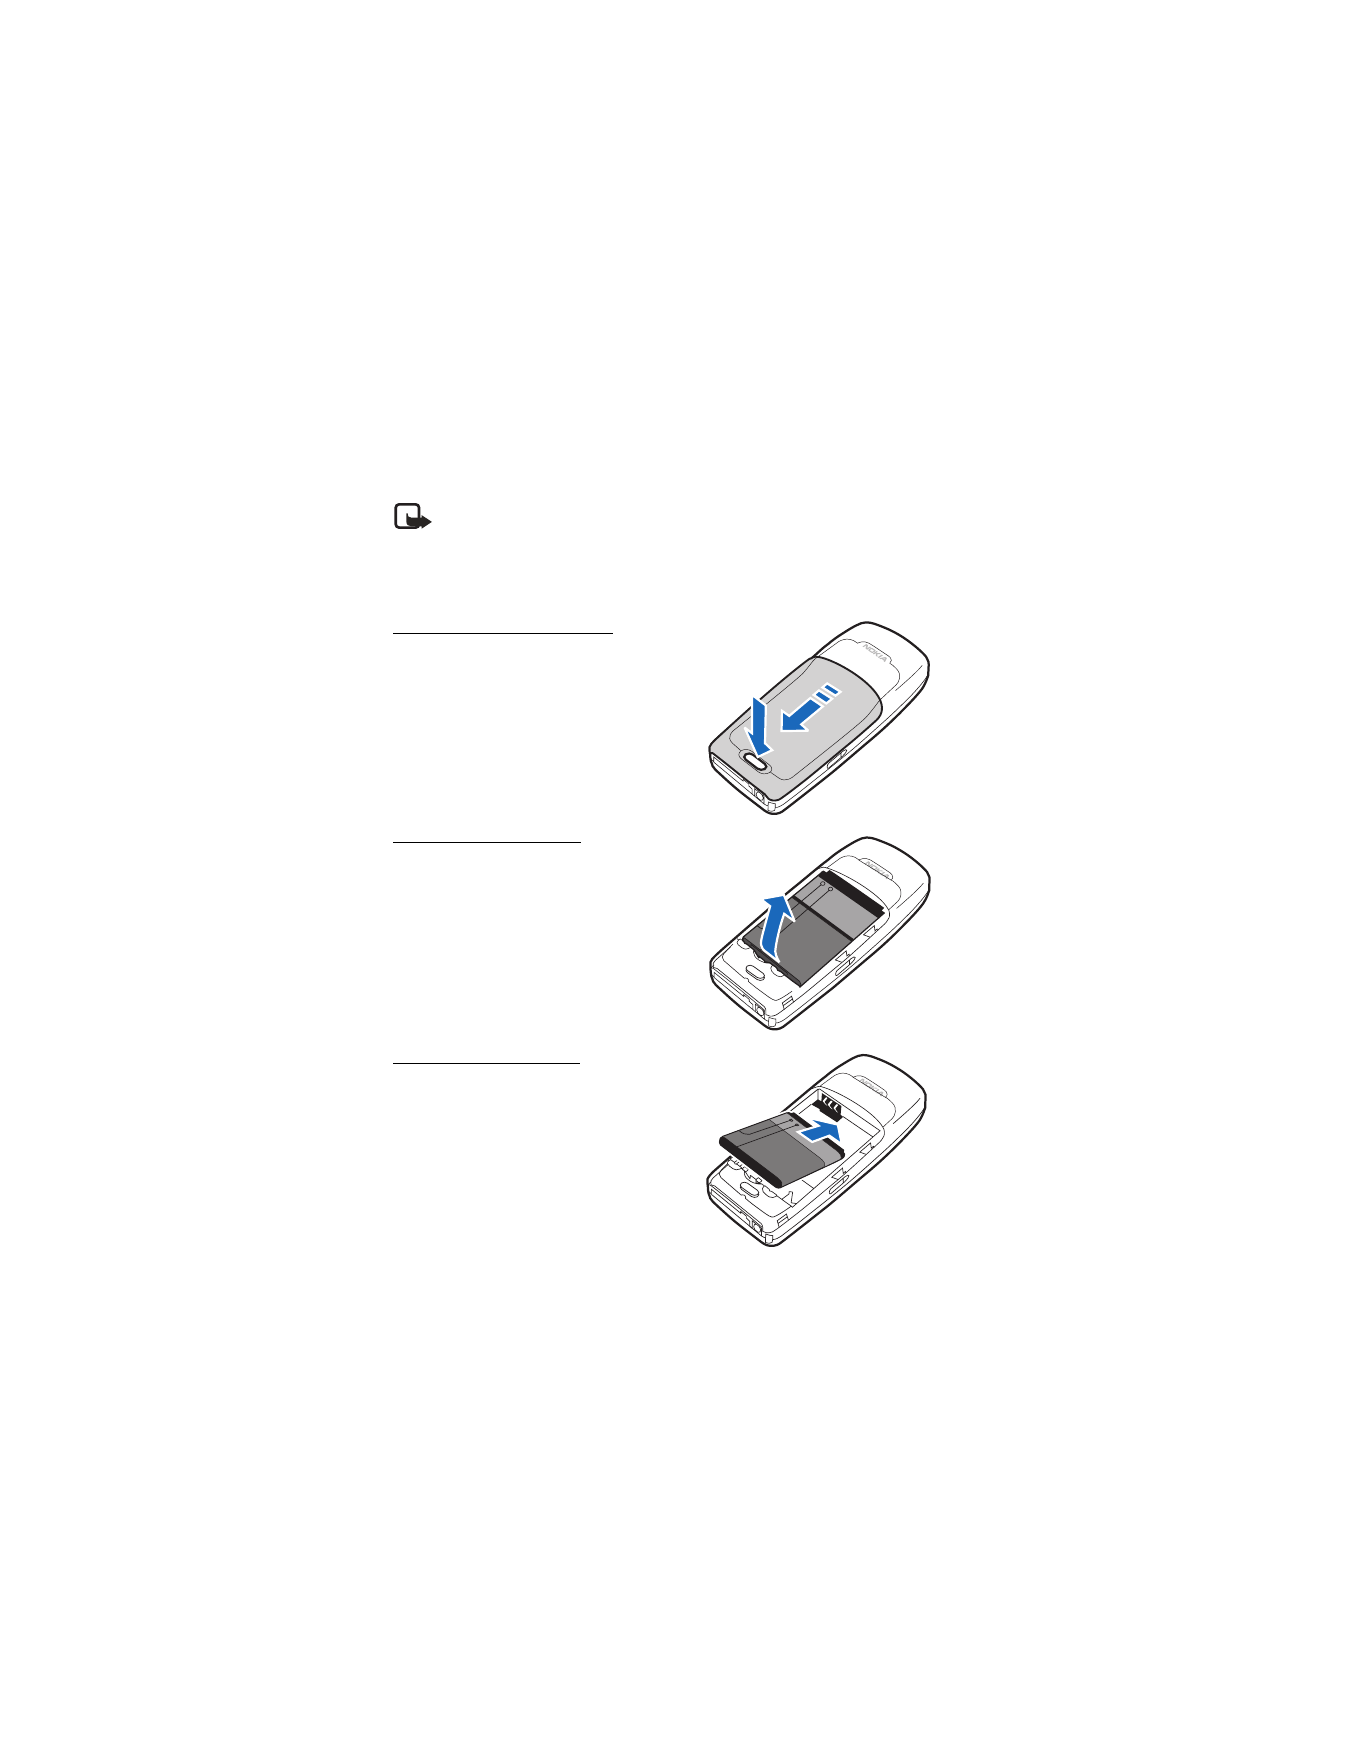
Remove the back cover
1. With the back of the phone facing
you, push down on the back cover
release button.
2. Slide the back cover toward the bottom
of the phone and remove.
Remove the battery
After you have removed the back cover,
insert your finger into the finger grip, and
lift the battery from its compartment.
Replace the battery
1. Position the battery so the positive and
negative indicators on the battery
match up with the positive and
negative indicators on the phone.
The battery label must face away from
the phone.
2. Insert the battery, gold-colored contact
end first, into the battery slot.
3. Push down on the other end of the battery to snap it into place.
S e t u p y o u r p h o n e
15
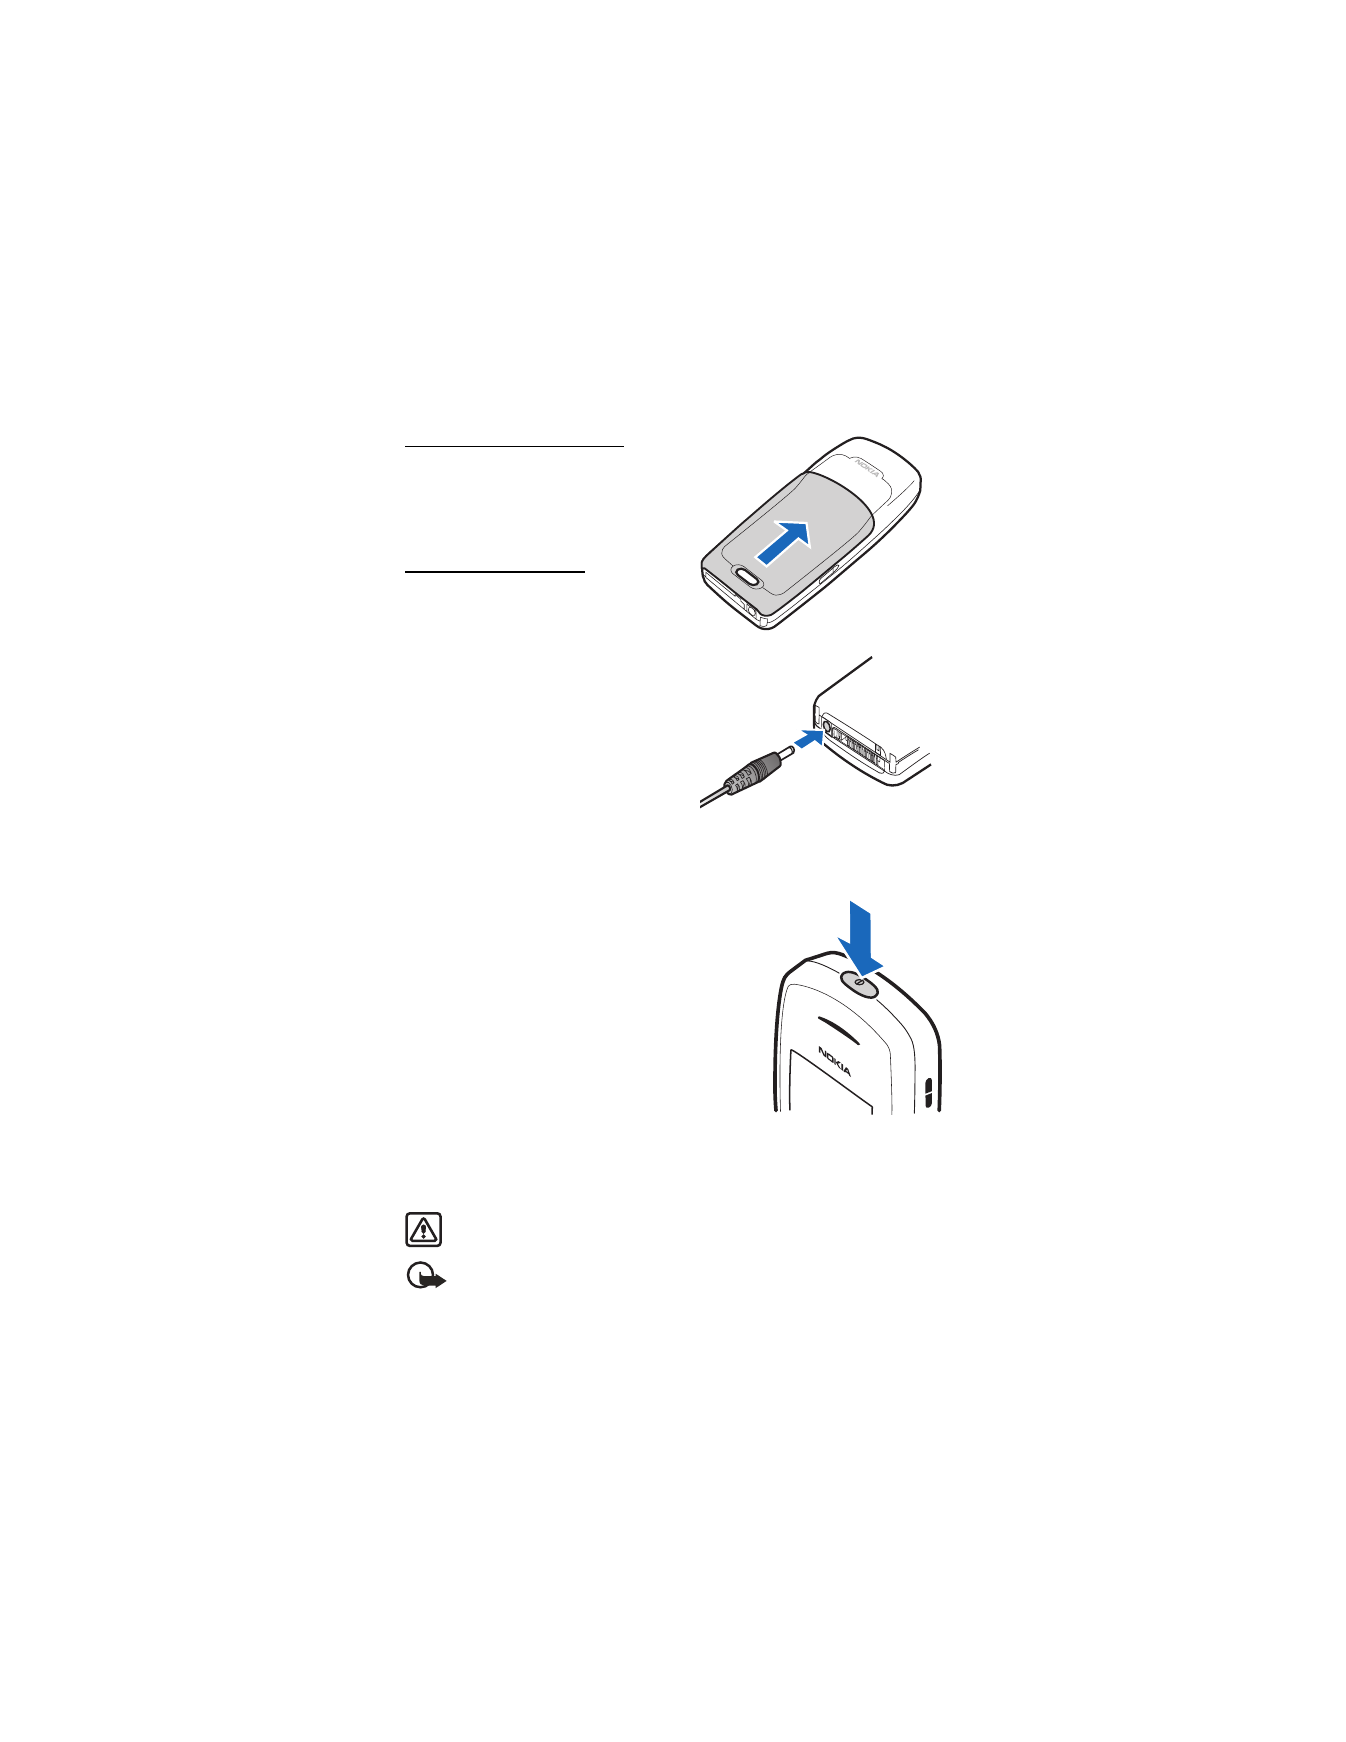
Replace the back cover
Slide the back cover toward the top of
the phone until the back cover is
securely in place.
Charge the battery
1. Plug the charger into a standard
ac outlet.
2. Insert the charger output plug into
the round jack at the bottom end of
the phone.
After a few seconds, the battery
indicator on the display starts to
scroll from bottom to top. If the
battery is completely discharged, it
may take a few minutes before the
charging indicator appears on the
display or before any calls can be made.
■ Turn your phone on or off
1. To turn your phone on or off, press and hold
the power key on top of the phone for at least
3 seconds.
2. Enter the lock code. if necessary, and select
OK
.
See "Security settings," p. 45.
■ Connect the headset
A compatible headset, such as HS-5, may be purchased with your phone or
separately as an enhancement. See "Enhancements," p. 62.
Warning: When using the headset, your ability to hear outside sounds may
be affected. Do not use the headset where it can endanger your safety.
Important: The headset may affect your ability to hear sounds around
you. Do not use this headset in situations that may endanger your safety.
S e t u p y o u r p h o n e
16
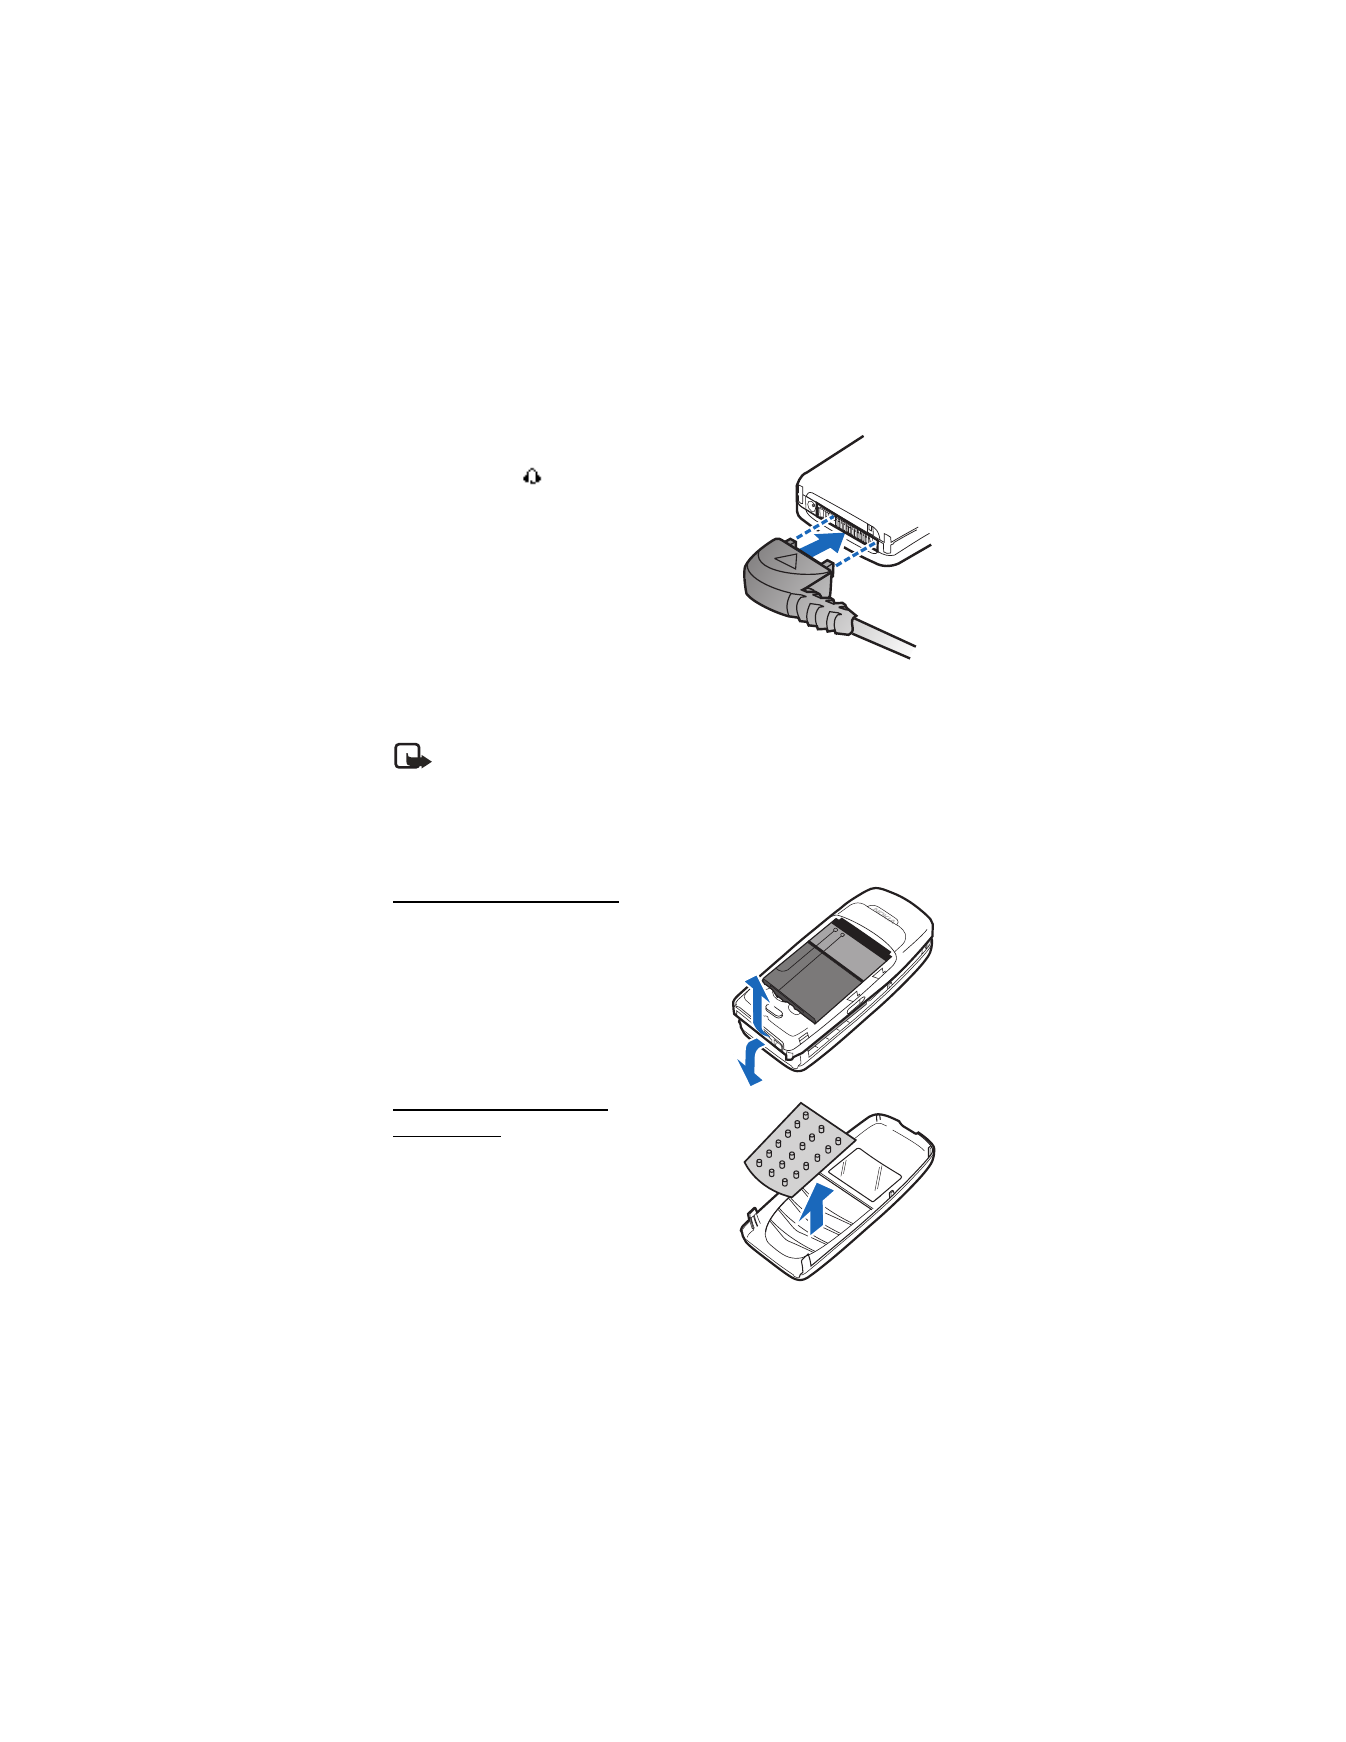
1. Plug the headset connector into the
Pop-Port™ connector at the bottom end
of your phone.
appears in the
standby mode.
2. Position the headset on your ear.
With the headset connected, make, answer,
and end calls as usual.
•
Use the keypad to enter numbers.
•
Press the call key to place a call.
•
Press the end key to end a call.
■ Change the Xpress-on™ covers
Note: Always switch off the power, and disconnect the charger and any
other device, before removing the cover. Do not touch electronic
components while changing the covers. Always store and use the device
with the covers attached.
To change the Xpress-on covers, first remove the back cover and battery.
Remove the front cover
Gently pull the bottom of the front cover away
from the rest of the phone.
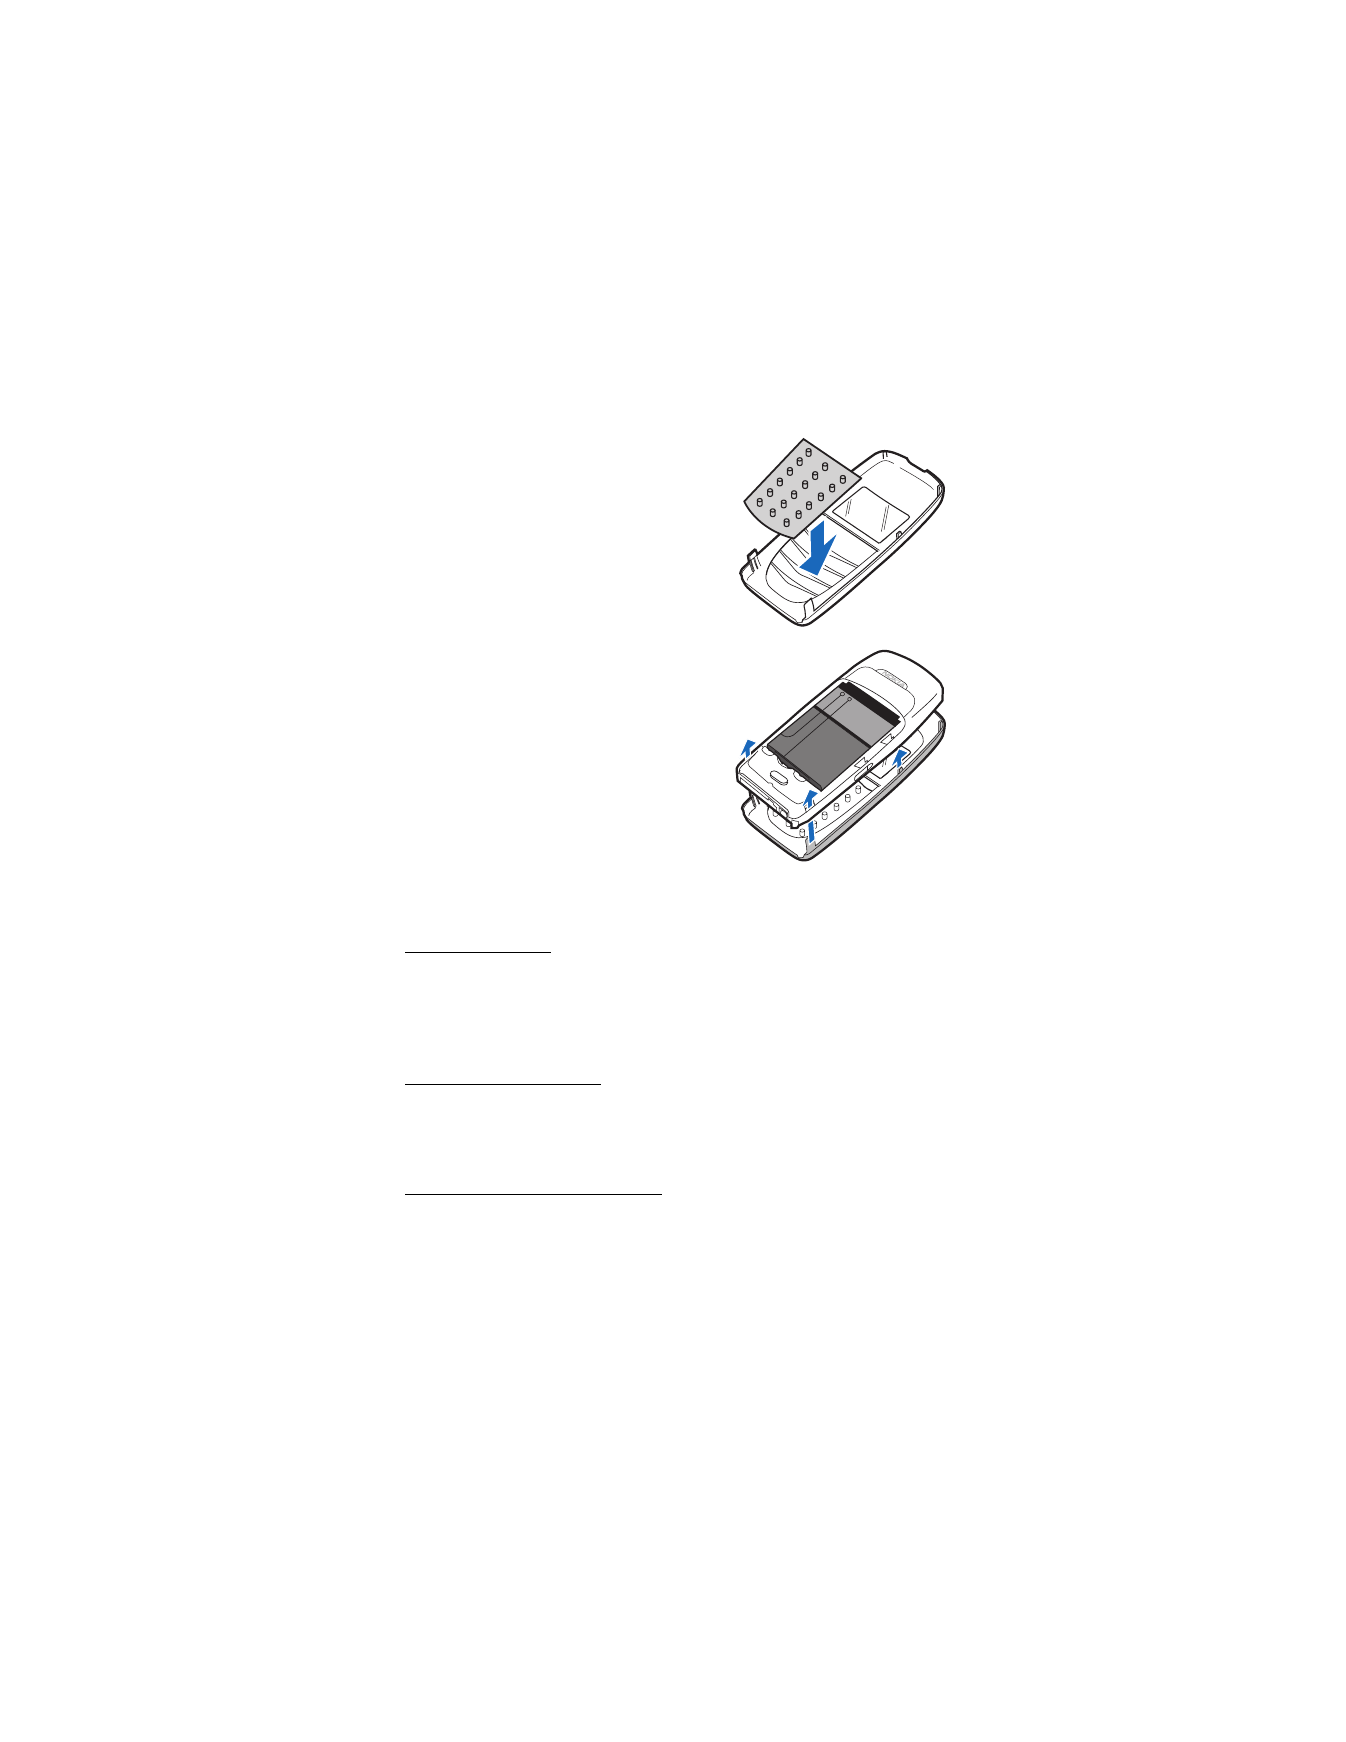
Install the keymat and
front cover
1. Remove the keymat from the old
front cover.
S e t u p y o u r p h o n e
17
2. Place the keymat into the new
front cover.
3. Press the front cover and keymat
against the phone, and snap the front
cover into place.
4. Replace the battery and back cover.
■ Make a call
Use the keypad
1. Enter the phone number (including the area code), and press the call key.
To delete a character to the left of the cursor, select
Clear
.
2. Press the end key to end the call, or select
End call
to cancel the call attempt.
Use the contacts list
1. In the standby mode, scroll down to the entry you wish to view.
2. Press the call key to make the call, or select
Details
to view details of the entry.
Use the last dialed number
1. In the standby mode, press the call key to display the last 10 numbers dialed.
2. Scroll to the number (or name) you wish to redial, and press the call key.

S e t u p y o u r p h o n e
18
■ Answer calls
Answer, silence, or decline an incoming call
Silence
and
Decline
are carrier dependent features.
1. Press the call key to answer the call.
2. To mute the ringing tone, select
Silence
. If you do not answer the call, the call
is forwarded to voicemail.
3. To dismiss and forward the call to voicemail (a carrier dependent feature),
select
Decline
after you have muted the ringing tone, or press the end key
at any time.
Answer a call with the keypad locked
To answer a call with the keypad locked, press the call key. During the call, all
features function normally. When you end, silence or decline the call, the
keypad automatically relocks. See "Keyguard," p. 19.
When the keyguard is on, calls still may be possible to the official emergency
number programed into your device.
Adjust the earpiece volume
While in a call, scroll up or down to adjust the volume of the earpiece.
When you adjust the volume, a bar chart appears in the display to indicate the
volume level.
Use the loudspeaker
You can use your phone as a loudspeaker during a call.
•
To activate the loudspeaker, select
Loudspeaker
.
•
To deactivate the loudspeaker during a call, select
Handset
.
The loudspeaker is deactivated automatically when a call (or a call attempt) ends,
or when certain enhancements are connected.
Warning: Do not hold the device near your ear when the loudspeaker is
in use, because the volume may be extremely loud.

S e t u p y o u r p h o n e
19
Options during a call
Many of the options used during a call are network services. Check with your
wireless service provider for more information.
1. Select
Options
to display the following:
Mute
or
Unmute
—Silence your end of the call.
Loudspeaker
or
Handset
—Activate or deactivate the loudspeaker while in a call.
End all calls
—Disconnect from all active calls.
Touch tones
—Enter the numbers, and select
Tones
to send the numbers as tones.
Contacts
—View the contacts list.
Menu
—View the phone menu.
2. Select an option to activate the option or enter its submenu.
■ Keyguard
Use keyguard, to lock the keypad and prevent keys from being pressed
accidentally. Remember to lock your phone keypad to prevent accidental
calls. If the keypad is locked, it unlocks when you receive a call. After the
call, the lock automatically reactivates.
When the keyguard is on, calls still may be possible to the official emergency
number programed into your phone. Enter the emergency number, and press
the call key. See "Automatic keyguard," p. 41.
Lock the keypad
Select
Menu
; then press * within 2 seconds.
Unlock the keypad
Select
Unlock
; then press * within 2 seconds.

T e x t e n t r y
20